Step 1: Download Tomcat 9 , Jenkin LTS 2.121 and Java 1.8
Create three directories /jenkins , /tomcat and /java. and download these installables.
- wget http://mirror.cogentco.com/pub/apache/tomcat/tomcat-9/v9.0.10/bin/apache-tomcat-9.0.10.zip
- wget https://updates.jenkins-ci.org/download/war/2.121.1/jenkins.war
-
sudo apt-get update
sudo apt-get upgrade
sudo apt-get install default-jdk
Step 2: Install Tomcat and configure Tomcat
Installing Tomcat:
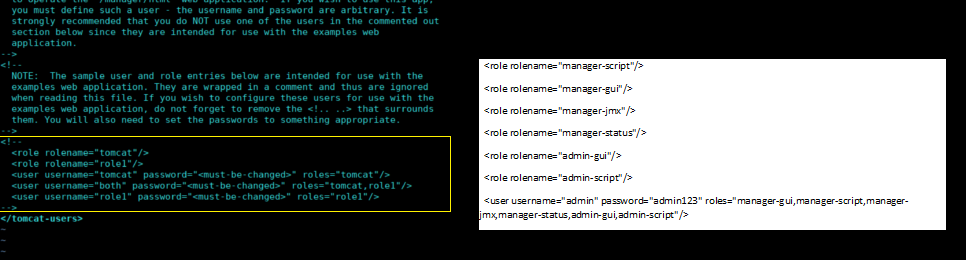
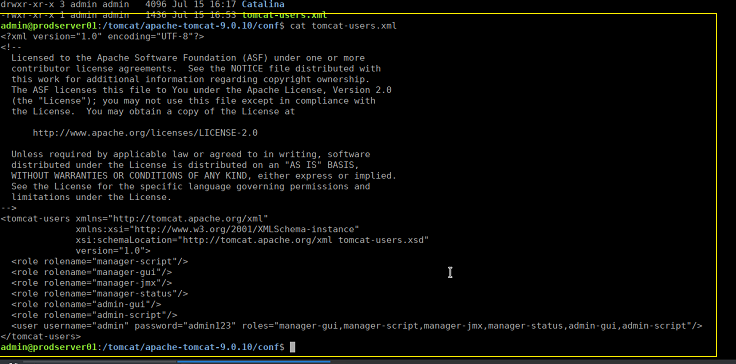
Step i. Just unzip tomcat in /tomcat directory and open tomcat-users.xml file in vi mode, which is located under "/tomcat/apache-tomcat-9.0.10/conf/tomcat-users.xml"
.
Delete the text highlighted under yellow rectangle and replace it by below mentioned text:
<role rolename="manager-script"/>
<role rolename="manager-gui"/>
<role rolename="manager-jmx"/>
<role rolename="manager-status"/>
<role rolename="admin-gui"/>
<role rolename="admin-script"/>
<user username="admin" password="admin123" roles="manager-gui,manager-script,manager-jmx,manager-status,admin-gui,admin-script"/>
Step ii: Just update the context.xml file ( vi /tomcat/apache-tomcat-9.0.10/webapps/manager/META-INF/context.xml ). highted under yellow should be replaced by below mentioned command:
highlighted under yellow by below mentioned configuration.
allow="\d+\.\d+\.\d+\.\d+" />

By default, tomcat allows its adminconsole to be accessable only to IP address starting from 127.* ( That is your local host ),
http://localhost:8080 or http://127.0.0.1:8080
That means, if you unix box has IP address 192.168.10.15 ( or any IP ), by default tomcat url will not be accessible through your unix server IP or buy its DNS.
example : http://192.168.10.15:8080 or http://yourServerDNS:8080
After making suggested change, you can access tomcat through server's ip and DNS.
Step iii: update Jenkin home in /tomcat/startup.sh
export JENKINS_HOME=/jenkins
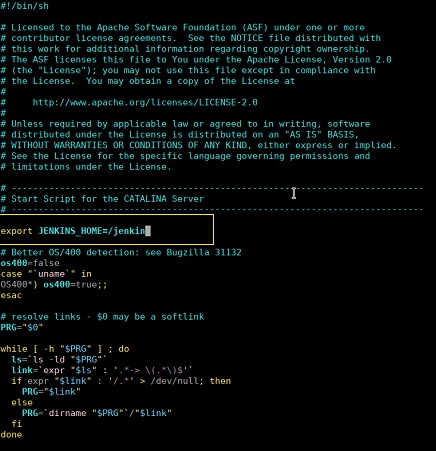
By default, if we move jenkins.war file ( which we have downloaded ) under Tomcat's webapp directory then jenkin will be installed in your profile home path ( /home/jenkins ), but we want jenkins to be installed under /jenkin directory only. So, we are explicitly telling Tomcat to make /jenkin as home directory for my Jenkin.
Restart your Tomcat server. You are all set now.
Try to access tomcat admin console using user id /password that we set during step i .
User Id : admin
Password: admin123

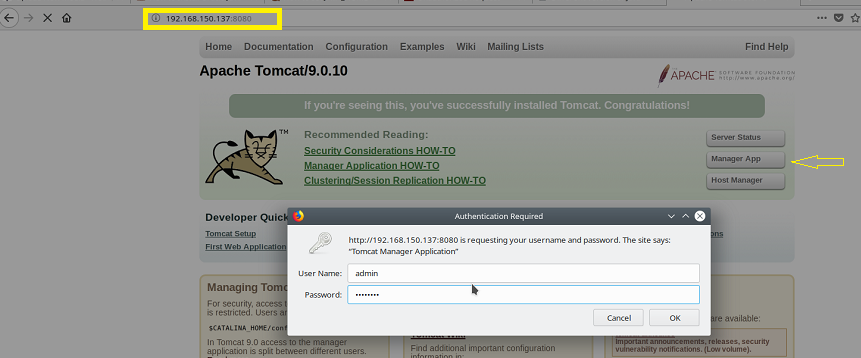
Troubleshooting: If you are not able to login to tomcat, make sure your tomcat-users.xml should exactly look like the screenshot shown below:
Step 3: Install and Configure JAVA
Just unzip downloaded java tar.gz file under /java
tar -xvf jdk-8u171-linux-x64.tar.gz
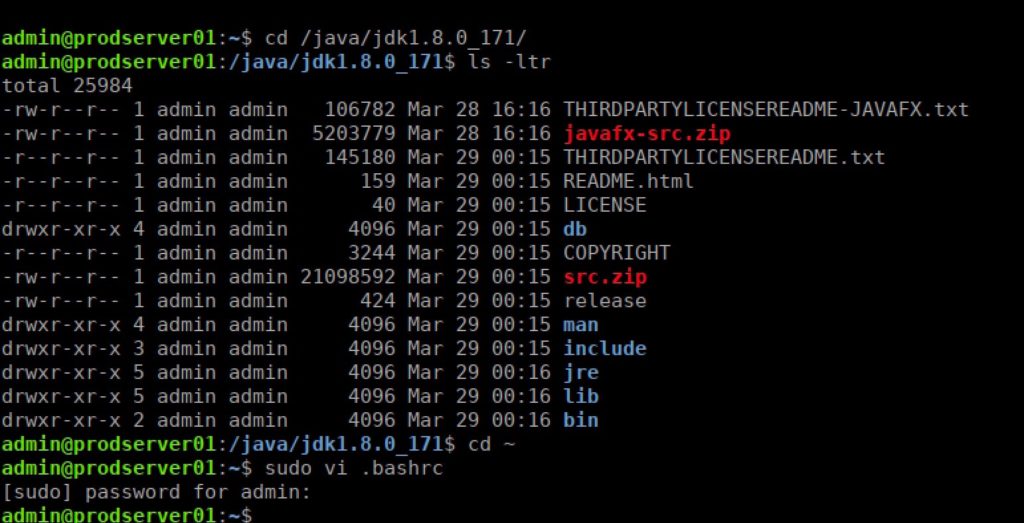
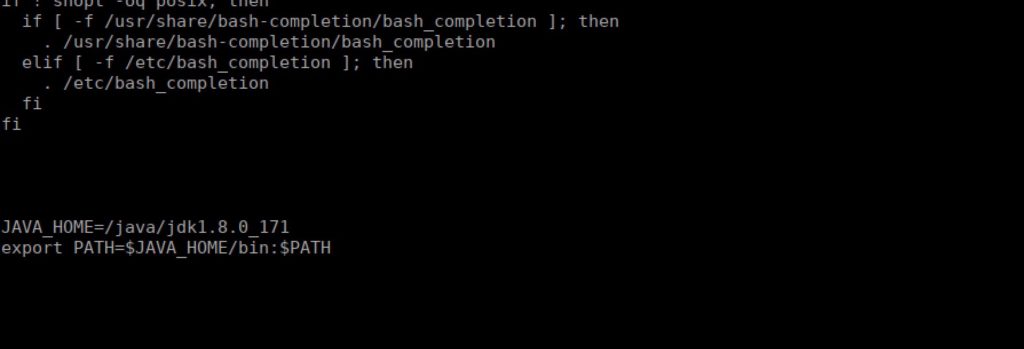
add below mentioned lines at the end in .bashrc file ( refere last three lines in above screenshot to open .bashrc file ).
JAVA_HOME=/java/jdk1.8.0_171
export PATH=$JAVA_HOME/bin:$PATH
exit from the terminal and reopen new terminal on your linux/ubuntu or unix.
You should be able to see your installed java version and installed java path.

Your Java is all set.
Step 4: Install and Configure Jenkins
We have already downloaded jenkins.war under /jenkin.
Step 1 : To deploy jenkins.war , we just need to move jenkins.war file from /jenkin directory to tomcat's webapps directory.
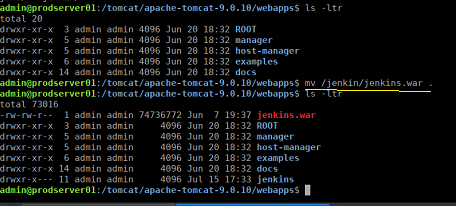
Jenkin is installed now.
http://192.168.150.137:8080/jenkins
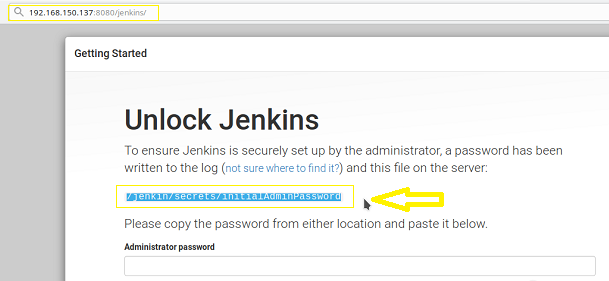
Copy the highlighted text ( above) and open it on your unix box. This is your onetime password.
admin@prodserver01:/tomcat/
024d78ce170043438b46c3efb49751
Copy the text highlighted above and paste it as jenkin's password and click on contunue.
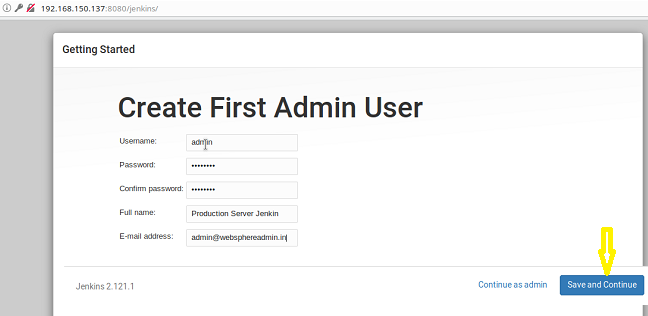
Select suggested plugins and follow the screen instruction ( very simple ) to setup jenkins basic configuration.
- A better way to capture Thread Dump to analyze high CPU
- WebSphere general queries
- Troubleshooting GC: Step by Step
- Request flow between Web browser and Application Server
- WebSphere App Server Performance Tuning & Troubleshooting
- WebSphere 8.5 Admin Console “Session has become invalid” .
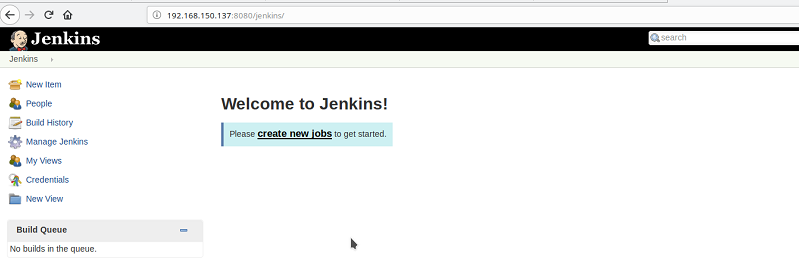
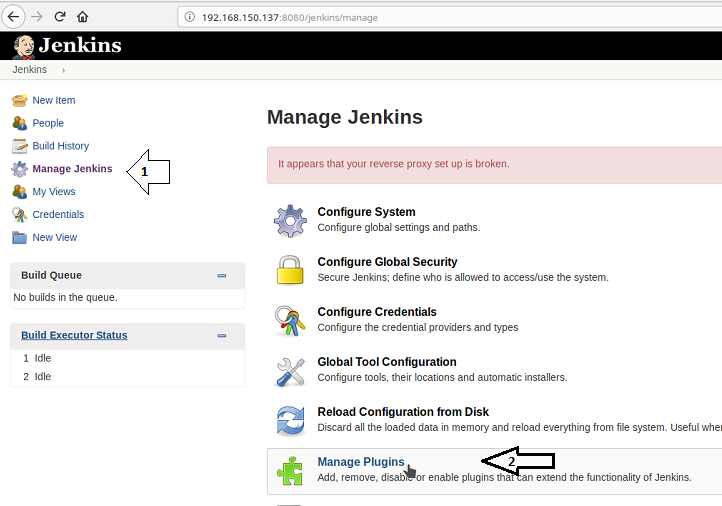
Launch Jenkin home Page
Click on Manager Jenkins and Then on Manager Plugins:
Click on Available and Then click on Filter. We can search "plugins" that we want to install and click on install.
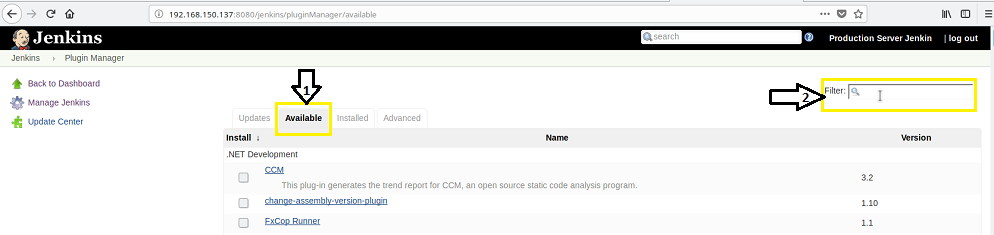
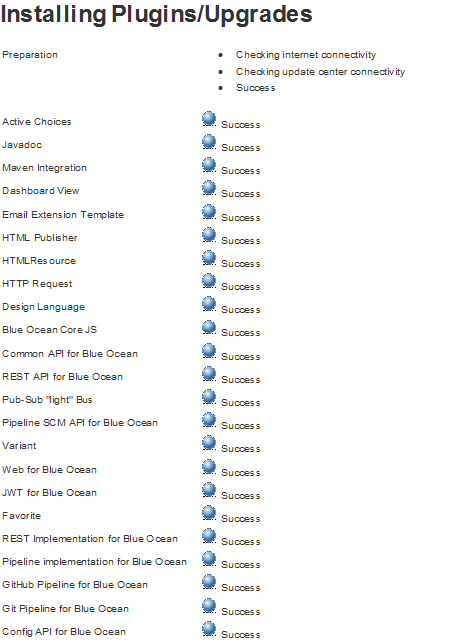
Please install these plugins. We will explore pipeline and blue ocean concepts in upcoming sessions.
Your Jenkins is all set now.
I will comeup with next "How to" on
a. How to configure Jenkins to manage WebSphere Application Server.
b. How to manage MQ Server.
c. How to Manage Jboss Server
etc.".
Step 4: Install and Configure Jenkins
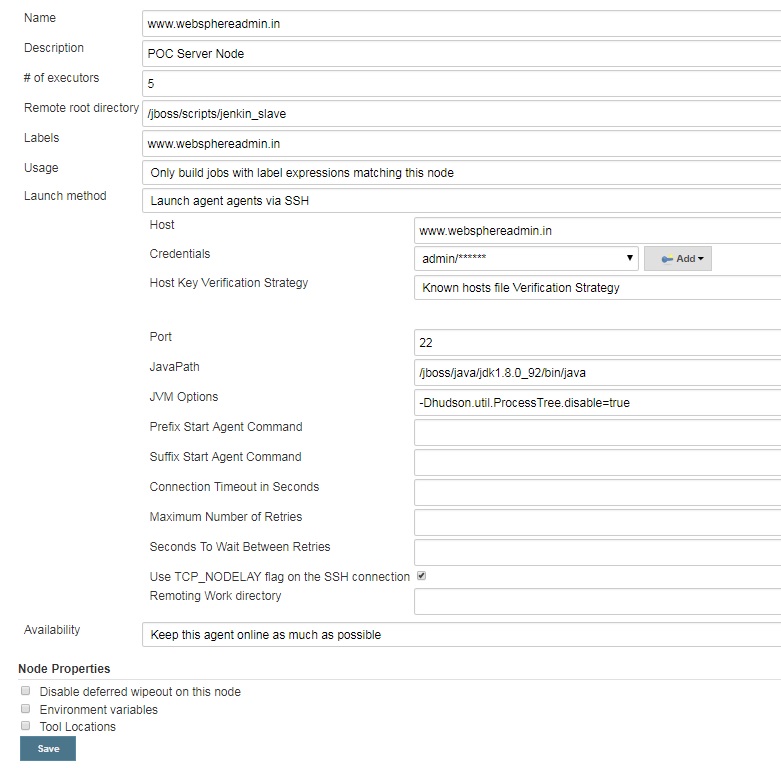
A Sample way to add a node