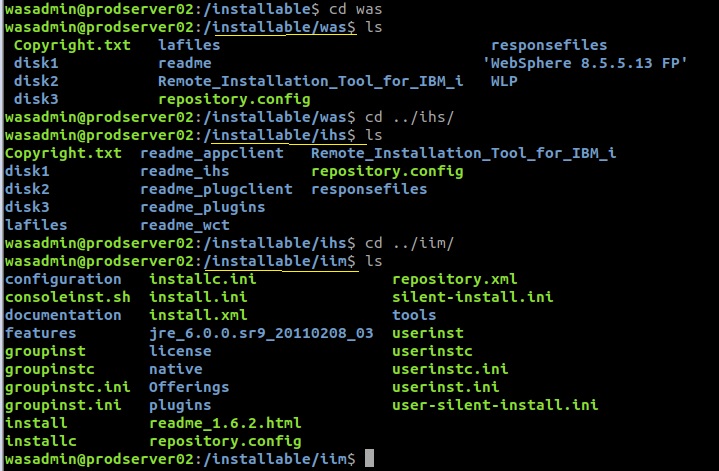
Make sure all installable softwares are available
- Download IBM Installation Manager and unzip it under /Installable/IIM
- Download all WAS 8.5 packages and unzip it under /installable/WAS85
- WAS_ND_V8.5_1_OF_3.zip
- WAS_ND_V8.5_2_OF_3.zip
- WAS_ND_V8.5_3_OF_3.zip
- Download all HIS Packages and unzip it under /installable/IHS
Install IIM - Silent Installation Steps
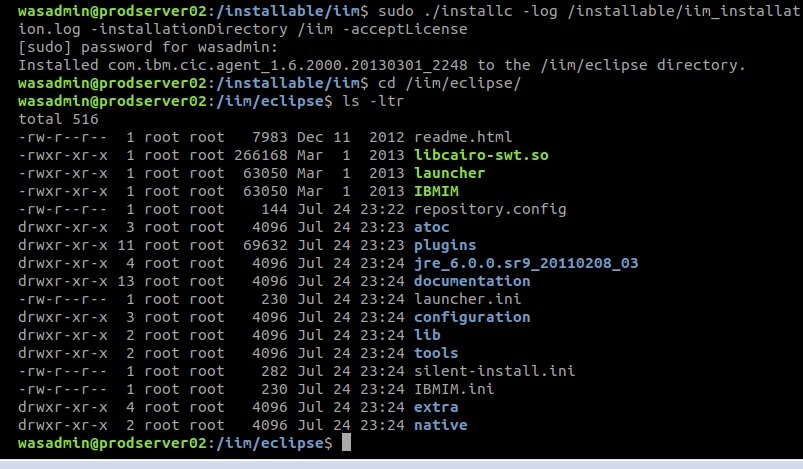
Execute the command shown in the screenshot:
./installc -log /installable/iim_installation.log -installationDirectory /iim -acceptLicense
Lets Check Installation log created during IIM installation.
A successful installation of IIM will not write anything in the output log. The log will just look like the screenshot shown below:

Create Response File for Installing WebSphere Binaries
Lets create a response file first before starting actual installation.
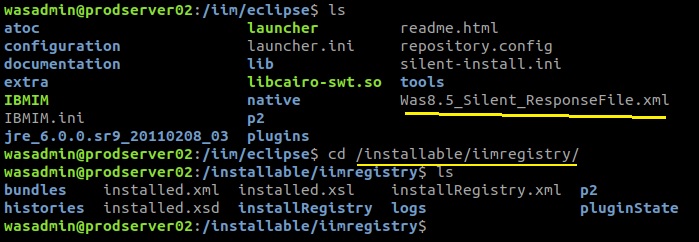
Step 1: cd /iim/eclipse/
Step 2: Please execute the command shown below to create a response file "Was8.5_Silent_Response.xml"

We are going to create a directory under "/installables/iimregistry" to store all configuration and temporary files that response file "Was8.5_Silent_ResponseFile.xml" will use to install WAS8.5.
Please follow the screenshots step by step :
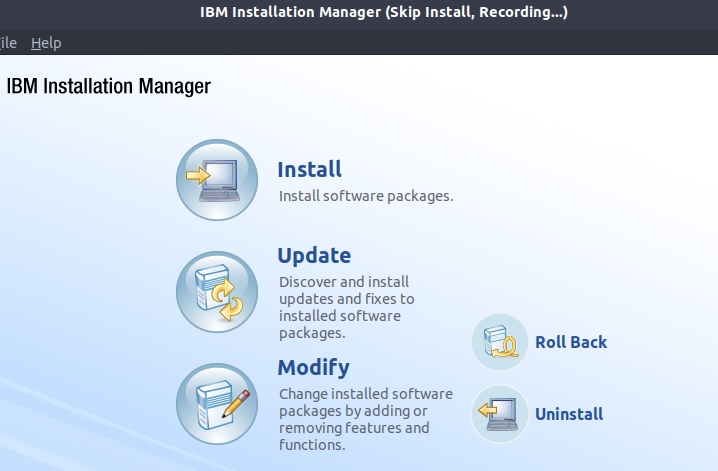
Sttep 3: Click on Install icon.
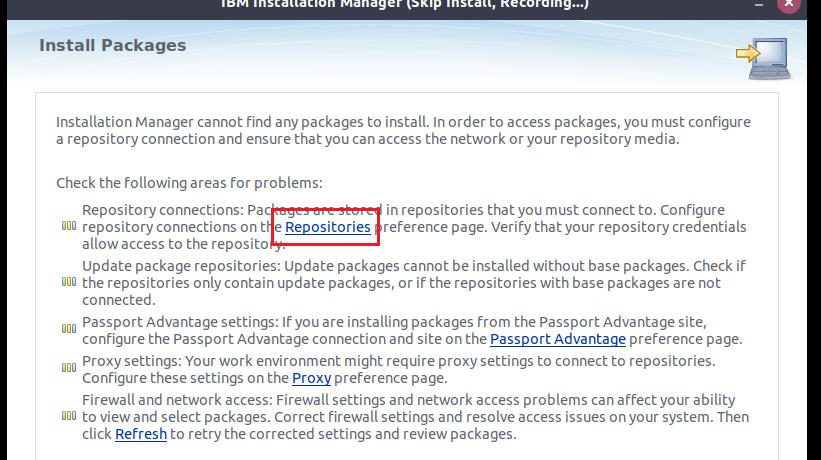
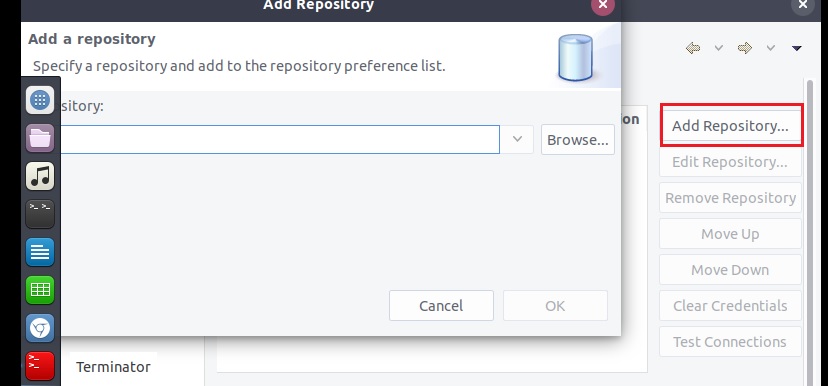
Step 4 : Click on highlighted area "Repositories"
Step 5 : Browse to the was installation media location. /installable/was

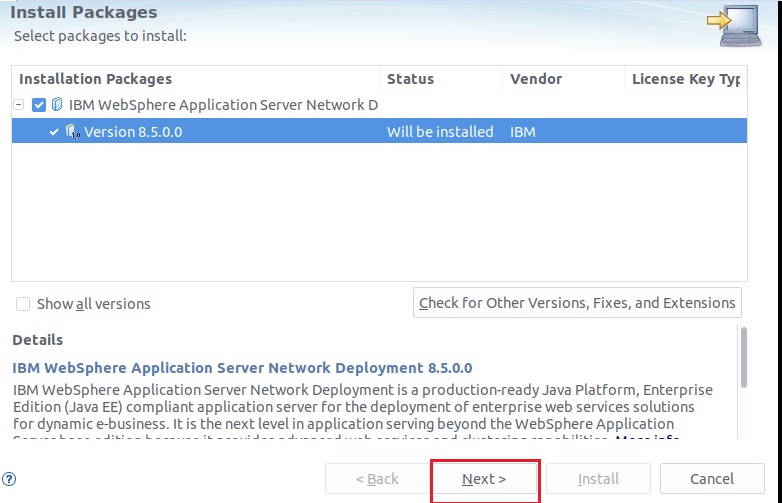
Step 7 : Select "Version 8.5.0.0" and click next.
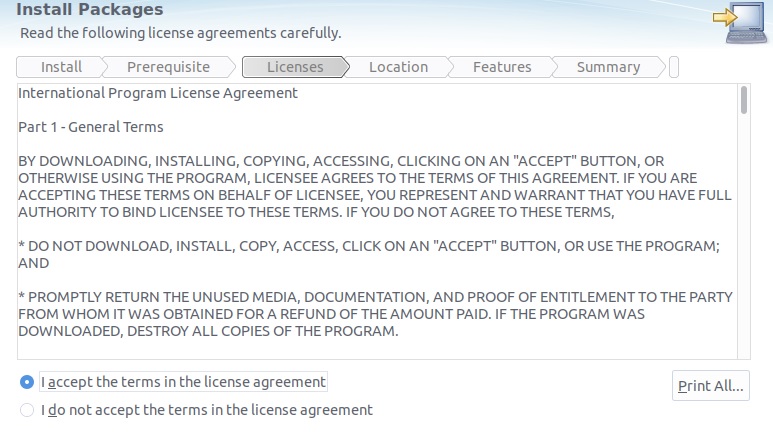
Step 8 : Accept the license agreement.
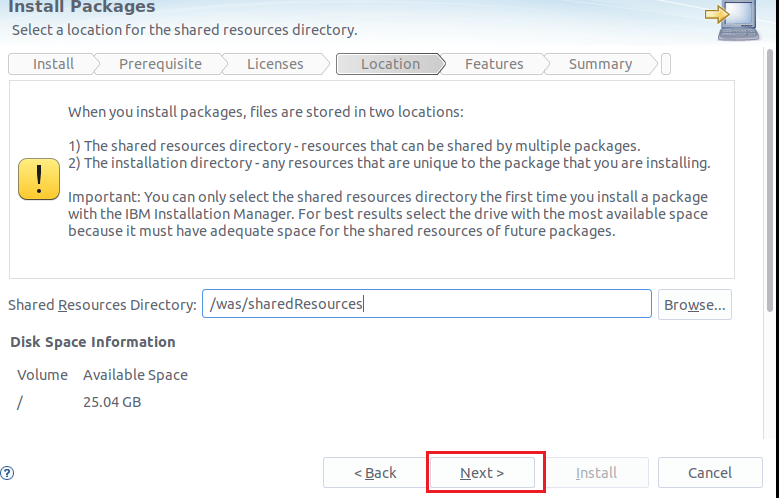
Step 9: Select a location where websphere should create shared resources.
Step 10: Select the location where WAS should be installed.
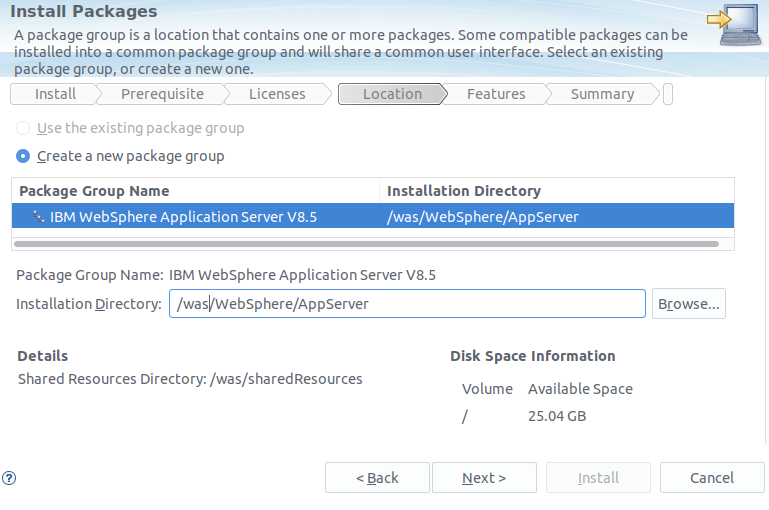
Step 11: Select the packages that should be installed during silent installation.

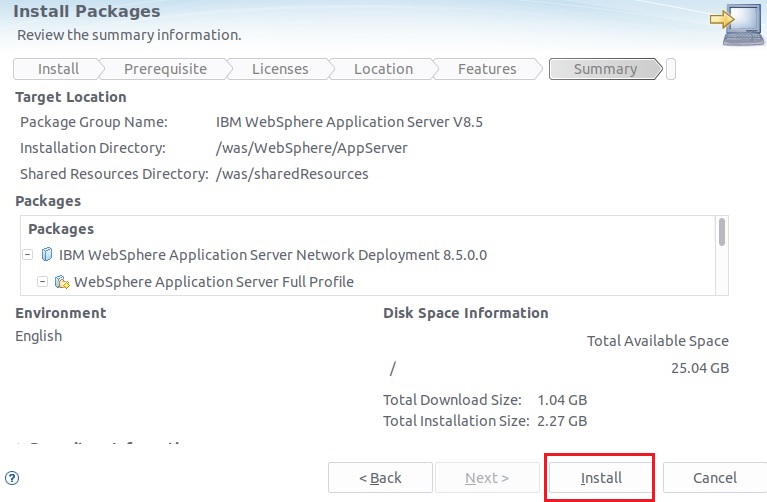
Step 12: Click on Install. This will not do any actual installation but will write the installation instruction in the response file.
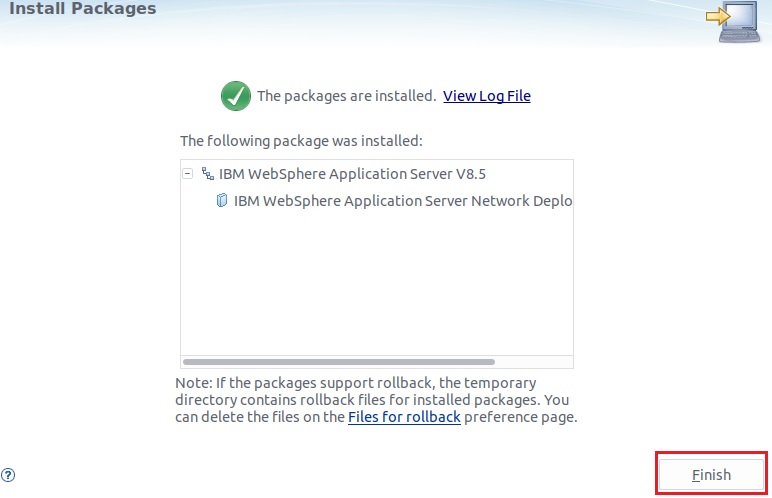
Step 13: Our Response file is ready now. Please click on finish . This response file generates in the present working directory ( /iim/eclipse ).
Step 14: You can see files that are created under iimregistery through -skipInstall and responsefile that we just now created.
Our response file to install IBM WebSphere 8.5 is ready now. Just open the response file and verify the details:
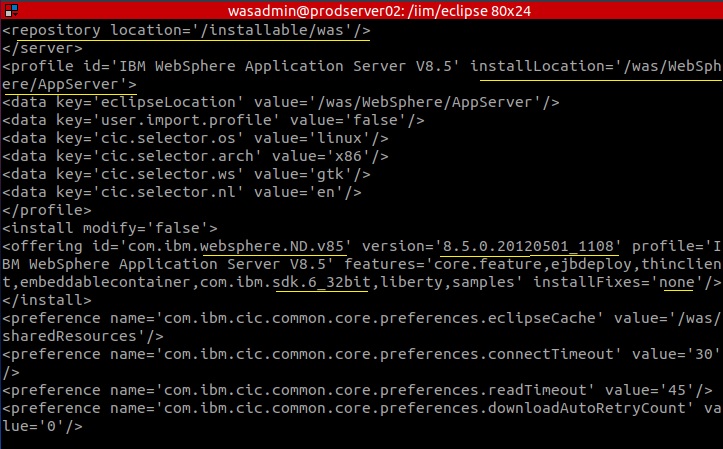
Repository for websphere 8.5.5 Trial version :
http://www.ibm.com/software/repositorymanager/com.ibm.websphere.NDTRIAL.v85
Install WebSphere 8.5
Lets Install WebSpheere core binary now.
Step 1: cd /iim/eclipse/
Step 2: sudo ./IBMIM --launcher.ini silent-install -input Was8.5_Silent_ResponseFile.xml -log /installable/Was_Installation.log -acceptLicense
The above command will take around 5 to 10 mins to show the output. The installation output is highlighted below
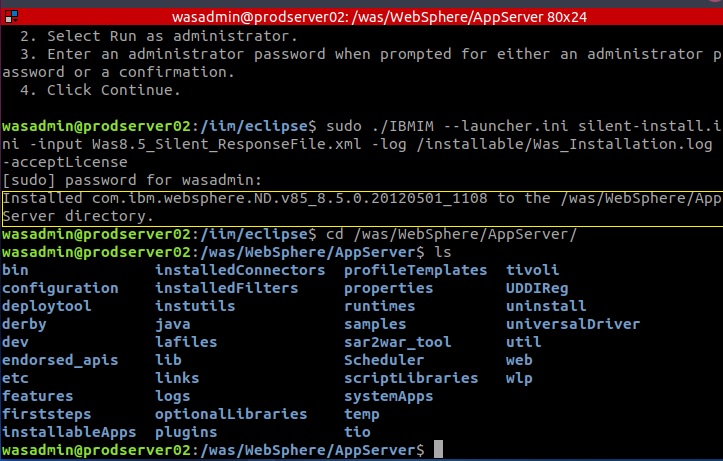
Lets see, how Successful installation log looks like:

Please make sure to check postinstall.log, the log should look like :
tail postinstall.log
<record>
<date>2018-10-07T11:17:00</date>
<millis>1538979420484</millis>
<sequence>106</sequence>
<logger>com.ibm.ws.postinstall</logger>
<level>INFO</level>
<class>com.ibm.ws.postinstall.LaunchUnifiedPostInstaller</class>
<method>logReturnCode</method>
<thread>0</thread>
<message>INSTCONFSUCCESS: All config actions ran successfully with return code 0</message>
</record>
Install Websphere Trial version using command line :
./imcl install com.ibm.websphere.NDTRIAL.v85_8.5.5014.20180802_1018 -repositories /IBM/IBM-ND-Trial/repository.config -installationDirectory /IBM/WebSphere/AppServer -log installWas.log -showProgress -acceptlicense
Install FixPacks and Create Profile
Installing FixPack:
Its highly recommended to install recommended fixpack on WAS at this stage before creating profiles.
Logon to the unix/Linux/AIX machine using putty
Give hostname and port number to connect to the host where Installation manager is installed.
In most of the cases Installation manager and base binaries of websphere ( before creating any profiles ) use to be on same host/server.
go to installation manager tools directory ( cd /iim/eclipse/tools/) and execute the below mentioned command to list all available packages.
./imcl listAvailablePackages -repositories /path/to/downloaded/FixPack/repository.config
Creating Profile Step by Step :
This is very important and need some basic planning , a chart very similar to example shown below will help:
| Profile Name | dmgr01 |
| Profile Root | /was/WebSphere/AppServer |
| Host Name | prodserver02 |
| Server Name | prodserver01 |
| Node Name and Cell Name | dmgrnode01 , cell01 |
| Network Deployment Admin User Id | wasadmin |
| Network Deployment Admin Password | ********* |
| Ports to be used , etc |
We are almost ready now. Lets create profile.
Create a deployment manager profile
The following example creates a deployment manager profile:
./manageprofiles.sh -create -profileName dmgr01 -profilePath /IBM/Websphere/Appserver/profiles/dmgr01 -templatePath /IBM/Websphere/Appserver/profileTemplates/dmgr -hostName 192.168.1.50 -nodeName dmgr01node01 -cellName cell01
- -create
- Creates a profile. (Required)
- -templatePath template_path
- Specifies the file path to the template. (Required)
Use the following format:
-templatePath install_root/profileTemplates/xd_augment/dmgr - -profileName
- Specifies the name of the profile. (Optional)
- -profilePath
- Specifies the intended location of the profile in the file system. (Optional)
- -hostName
- Specifies the host name of the profile. (Optional)
- -nodeName
- Specifies the node name of the profile. The name must be unique within the cell. (Optional)
- -cellName
- Specifies the cell name of the profile. The cell name must be unique for each profile. (Optional)
- -isDefault
- Designates the profile as the default target of commands that do not use a profile parameter. (Optional)
- -omitAction
- Omits optional features. (Optional)
- -adminUserName
- Specifies the valid username for use with administrative security. (Optional)
- -adminPassword
- Specifies the password that is used with the name specified with the -adminUserName parameter. (Optional)
- -portsFile
- Specifies the path to a file that defines port settings for the new profile. Do not use this parameter with the -startingPort or -defaultPortsparameters. (Optional)
- -startingPort
- Specifies the starting port number for generating all ports for the profile. Do not use this parameter with the -portsFile or -defaultPortsparameters. (Optional)
- -defaultPorts
- Accepts the default ports for the new profile. Do not use this parameter with the -portsFile or -startingPort parameters. (Optional)
- -validatePorts
- Specifies which ports to validate to ensure the ports are not already in use or reserved. (Optional)
Create a custom profile
The following example creates a custom profile:
wasadmin@pocserver01:/IBM/WebSphere/AppServer/bin$ ./manageprofiles.sh -create -profileName dmgr01 -profilePath /IBM/WebSphere/AppServer/profiles/dmgr01 -templatePath /IBM/WebSphere/AppServer/profileTemplates/dmgr/ -hostName 192.168.0.142 -nodeName dmgrNode01 -cellName cell01
- -create
- Creates a profile. (Required)
- -templatePath template_path
- Specifies the file path to the template. (Required)
Use the following format:
-templatePath install_root/profileTemplates/xd_augment/managed - -profileName
- Specifies the name of the profile. The parameter is optional, but is issued by default if no values are specified.
- -profilePath
- Specifies the intended location of the profile in the file system. The parameter is optional, but is issued by default if no values are specified.
- -hostName
- Specifies the host name of the profile. The parameter is optional, but is issued by default if no values are specified.
- -nodeName
- Specifies the node name of the profile. The name must be unique within the cell. The parameter is optional, but is issued by default if no values are specified.
- -cellName
- Specifies the cell name of the profile. The cell name must be unique for each profile. The parameter is optional, but is issued by default if no values are specified.
- -federateLater
- Federates the node at a later time. Specify the value as true. The parameter is optional, but is issued by default if no values are specified.
- -dmgrHost
- Specifies the workstation in which the deployment manager is running. The parameter is optional, but is issued by default if no values are specified.
- -dmgrPort
- Specifies the SOAP port of the deployment manager. The parameter is optional, but is issued by default if no values are specified.
- -isDefault
- Designates the profile as the default target of commands that do not use a profile parameter. (Optional)
- -omitAction
- Omits optional features. (Optional)
- -portsFile
- Specifies the path to a file that defines port settings for the new profile. Do not use this parameter with the -startingPort or -defaultPortsparameters. (Optional)
- -dmgrAdminUserName
- Specifies the username of the deployment manager that you want to federate to. (Optional)
- -dmgrAdminPassword
- Specifies the password for the deployment manager that you want to federate to. (Optional)
manageprofiles.sh -create -profileName dmgr01 -adminUserName wasadmin -adminPassword wasadmin -enableAdminSecurity true -cellName cell01 -nodeName dmgrnode01 -profilePath /was/WebSphere/AppServer/profiles/dmgr01
Please Note :
The IBM scripts have a bug in that they assume your default shell is bash. You should make sure that /bin/sh maps to /bin/bash
Execute
ls -al /bin/sh
If It is maps to dash, your profile creation process will take neary 45 mins and its will fail. If you monitor the GUI closely, it will get stuck at the stage displayed below fore more than 30 to 45 minues before showing the error message. 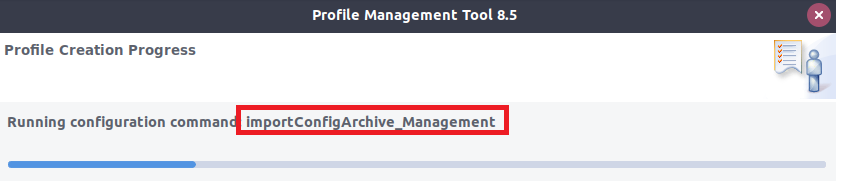
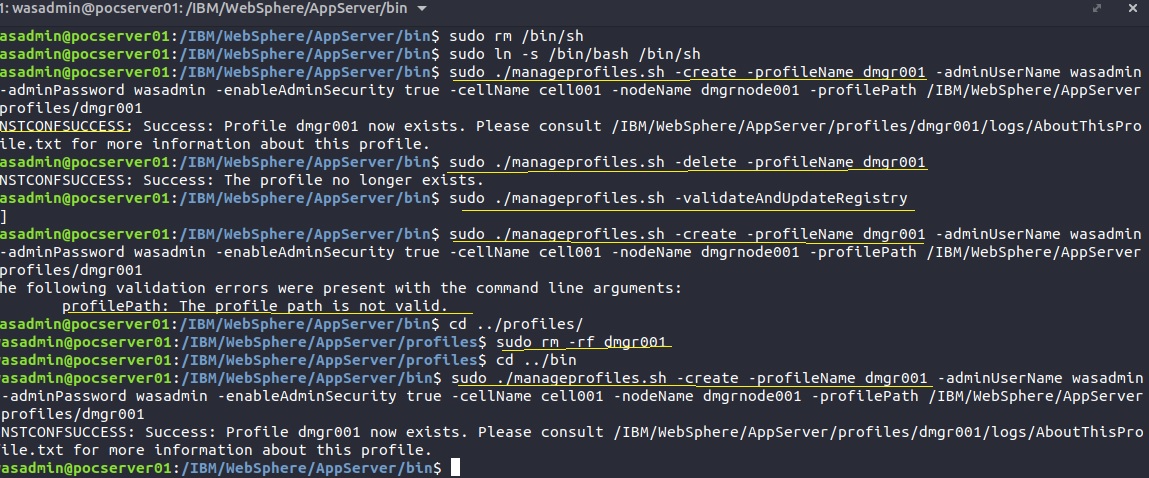
If it maps to dash execute the following commands and rerun profile creation script or GUI.
sudo rm /bin/sh
sudo ln -s /bin/bash /bin/sh
How To Delete Profile
Steps To Backup and restore a Profile :
./manageprofiles.sh -backupProfile -profileName Dmgr01 -backupFile /installables/Dmgr01.zip
/manageprofiles.sh -restoreProfile -backupFile /installables/Dmgr01.zip
Summary


sudo ./manageprofiles.sh -create -profileName Dmgr01 -profilePath /IBM/WebSphere/AppServer/profiles/Dmgr01 -templatePath /IBM/WebSphere/AppServer/profileTemplates/management -serverType DEPLOYMENT_MANAGER -nodeName Dmgr001Node -cellName Dmgr01NodeCell -hostName pocserver01 -isDefault -startingPort 20000
sudo ./manageprofiles.sh -create -profileName AdminAgent01 -profilePath /IBM/WebSphere/AppServer/profiles/AdminAgent01 -templatePath /IBM/WebSphere/AppServer/profileTemplates/management -serverType ADMIN_AGENT -nodeName AdminAgent01Node -hostName pocserver01 -isDefault -startingPort 21000
sudo ./manageprofiles.sh -create -profileName JobMgr01 -profilePath /IBM/WebSphere/AppServer/profiles/JobMgr01 -templatePath /IBM/WebSphere/AppServer/profileTemplates/management -serverType JOB_MANAGER -nodeName JobMgr01Node -cellName JobMgr01NodeCell -hostName pocserver01 -isDefault -startingPort 22000
sudo ./manageprofiles.sh -create -profileName SecureProxySrv01 -profilePath /IBM/WebSphere/AppServer/profiles/SecureProxySrv01 -templatePath /IBM/WebSphere/AppServer/profileTemplates/secureproxy -nodeName SecureProxySrv01Node -serverName secproxy1 -hostName pocserver01 -isDefault -startingPort 23000
sudo ./manageprofiles.sh -create -profileName Custom01 -profilePath /IBM/WebSphere/AppServer/profiles/Custom01 -templatePath /IBM/WebSphere/AppServer/profileTemplates/managed -nodeName Custom01Node -cellName Custom01Cell -hostName pocserver01 -isDefault -dmgrHost pocserver01 -dmgrPort 20003 -adminUserName wasadmin -adminPassword wasadmin -startingPort 24000
sudo ./manageprofiles.sh -create -profileName AppServer01 -profilePath /IBM/WebSphere/AppServer/profiles/AppServer01 -templatePath /IBM/WebSphere/AppServer/profileTemplates/default -nodeName AppServer01Node -cellName Default01Cell -hostName pocserver01 -isDefault -startingPort 25000